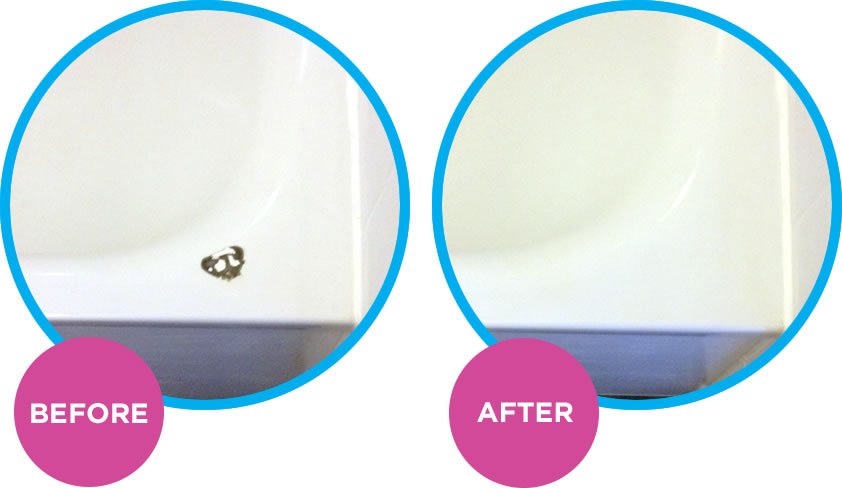
Over time, any bathtub can suffer a bit of wear and tear. This might be anything from a few surface scratches that you don’t mind, or it could be that larger chips have started to come loose and you’re worried about the integrity of your tub. Either way, this is something that you can fix up yourself with the right tools and a few instructions.
- How to repair small chips in your bathtub using epoxy
Step 1: Get yourself a bathroom chip repair kit
You can get these kits online or in most hardware stores to repair chips in bathroom surfaces that include enamel, fibreglass, porcelain and acrylic. For your bathtub, make sure you get one that has a 2 component epoxy mix (catalyst and hardener).
Step 2: Clean and dry the affected area
Use a damp sponge or rag with bathroom cleaner or washing up liquid to give the area a thorough clean and rinse. Then, make sure it’s bone dry before you get to work.
Step 3: Mix and apply the epoxy
Lay down some cardboard or plastic to protect your floor as you mix. As each kit differs, make sure to follow the kit’s instructions exactly, even if you’ve used bathroom epoxy previously. For the mixing, you’ll need a throwaway tray to mix the product on (if your kit doesn’t include one) and something to mix with, like an old knife or even a toothpick.
When you have a smooth consistency, apply the epoxy to the affected areas with a throwaway brush or spatula in a thin layer. Take some time to smooth it out so that it fills any crevasses and is flush with the surface.
Tip: Less is more! Start with a small blob of the epoxy as it will be easier to control. You can always add more as and when you need it.
Step 4: Sand down the surface
When the epoxy is bone dry, use a course sandpaper to sand down the affected areas until they are smooth and completely flush with the surrounding area. And that’s it!
- How to repair significant damage to your bathtub | Refinishing
If the scratches or chips are deep into the surface or are over a larger area of the surface, you might want to completely refinish the surface. This is a bigger job, but still doable with the right know-how.
Step 1: Get yourself a bathtub refinishing kit
You can find these online or at most hardware shops. These kits vary quite a bit, but the most important thing to look out for is that the coating is made with resin (rather than epoxy) which will be the most durable and long-lasting option.
Step 2: Get prepared
This means opening all the windows (and closing the door) for ventilation, covering the floor and bathroom furniture with plastic and putting on protective goggles and mask.
Step 3: Thoroughly clean and sand your bath
Most kits will come with special cleaner that will do the job well. Make sure to rinse the entire area thoroughly too. If yours doesn’t, you’ll need to purchase an industrial strength cleaner for the job.
Once the surface is completely bone dry, sand the whole bathtub with sandpaper (which should come with your kit). This removes the finish that’s already on the surface.
Step 4: Fill any chips using epoxy (by following part A of this guide)
Doing this ensures that you have a smooth surface to apply the finishing product to and will give you the most professional results.
TIP: To keep things tidy, use painter’s tape to seal the edges and any plumbing fixtures to avoid any accidents.
Step 5: Apply the primer and let it dry
Using a roller, cover the body of the tub. A brush can be used for the hard-to-reach places. This should be left to dry out completely before the finishing product is applied.
Step 6: Apply the new finish
The finish should be applied in 2 or 3 coats. Each coat needs to dry completely before the next. Take your time applying the product, using a roller and brush to get an even finish.
TIP: For the smoothest finish, you can find kits that come with a spray-on finish.
Step 7: Be patient
Drying time can take up to 3 days (depending on your finishing kit) so be prepared to not use it for a few days! You don’t want streaks to form, so it’s worth following the guidance on your kit carefully.
We Restore Surfaces
Doing this work yourself will save you a few bob. But, bear in mind that repairing your tub yourself takes a bit of time and patience. You will get the most professional looking results if a professional does the job, so if you decide that this project isn’t for you, WeRestoreSurfaces are pros at exactly this.
CONTACT US
For more information regarding our services, please do not hesitate to contact us by giving us a call for a free quote. Alternatively, fill out the enquiry form and we will get back to you as soon as possible.
CALL US
For a free quote, call us on